Motorola Router Admin Setup: Motorola have created a different company or a branch in order to take care of the cable modems, Ethernet gateways and many more computer networking solutions that have been in demand. In their journey, they have become the leading cable modems and router company in the world after 20 years of hard work and customer satisfaction which is really a huge growth and reasons why people believe to use their products. Their routers and modems are designed not only for in house house but can also be used for commercial purposes like Institutes, Schools, Companies, IT Offices and many more where large numbers of devices require Internet connection. The range of WiFi routers have increased over time and you can choose any of their product that matches your criteria but one thing is sure that all of their products are really well made and reasonable in terms of the cost pricing as well.
Motorola Router Wireless Configuration Setup Process – Internal Settings & Login Process
Login Process: So before you head on to the configuration steps, you will have to have the access to the Motorola router admin panel through which the further setup can be done. You can follow the instructions below to get the access.
- First open any of the browser from either laptop or computer which is connected to the router via ethernet cable
- After that in the address bar of the selected browser, enter the Motorola router IP address 192.168.0.1 and now either click on the go button or the enter button
- Next you will see a login popup appear on the same window and here you need to enter the login credentials which are asked, i.e., Username and Password
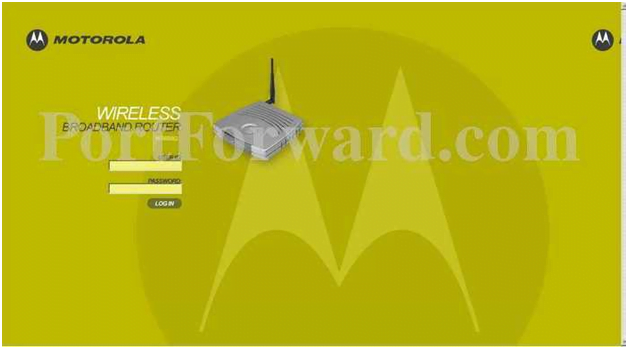
- Username will be admin and the Password will be Motorola, enter these details and then simply click on the login button to get the access to the admin panel
Motorola Routers Wireless Setup Guide – Step by Step Configuration Process
Once you have the access to the admin panel, you may follow the steps mentioned below which will guide you to easily configure the Motorola router and setup the wireless settings.
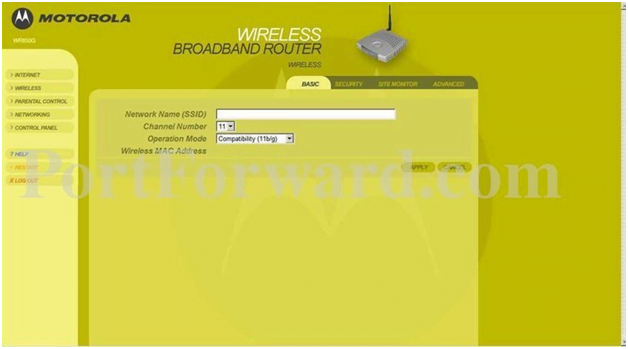
Basic – Wireless Settings: Go to the left sidebar of the router homepage, then click on Wireless option and then form the tabs, select Basic option and under this make the below said changes.
- Network Name (SSID): Enter your router’s network name here and this can be anything and you can name this as per your own preference
- Channel Number: Select “11” option
- Operation Mode: Select “Compatibility (11b/g)” option and then click on the Apply button
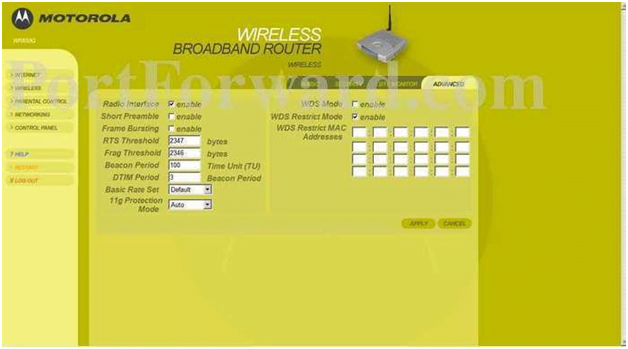
Advanced – Wireless Settings: Now go to the Wireless option on the left sidebar, click on it and then under this page click on Advanced tab and next under this you need to make the changes as per the below instructions.
- Radio Interface: Select this option “enable”
- Short Preamble: Do not select this option “enable”
- Frame Bursting: Do not select this option “enable”
- RTS Threshold: Enter “2347” number here
- Frag Threshold: Enter “2346” number here
- Beacon Period: Enter “100” number here
- DTIM Period: Enter “3” number here
- Basic Rate Set: Select “Default” option here
- 11g Protection Mode: Select “Auto” option here
- WDS Mode: Do not select this option “enable”
- WDS Restrict Mode: Select this option “enable”
- WDS Restrict MAC Address: Leave this option empty and click on Apply button
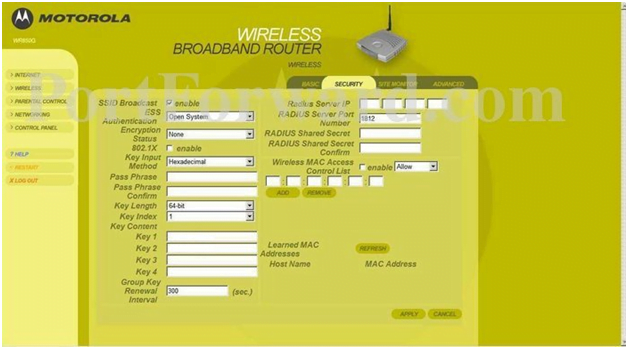
Security – Wireless Settings: The same way, go to the Wireless option present in the left sidebar and click on it, which will show you the tab options under which you have to click on Security option and then make the changes as per the below settings.
- SSID Broadcast: Select “enable” option
- ESS Authentication: Select “Open System” option here
- Encryption Status: Select “none” option here
- 802.1X: Do not select this option “enable”
- Key Input Method: Select “Hexadecimal” option here
- Pass Phrase: Enter your router network’s password here
- Pass Phrase Confirm: Enter the router network’s password here once again
- Key Length: Select “64-bit” option here
- Key Index: Select “1” option here
- Key Content and under this Key 1, enter your password again
- Group Key Renewal Interval: Enter “300” number here
- Wireless MAC Access Control List: Select “Allow” option here and then finally click on the Apply button for the changes to be saved
What is the Default IP for Motorola Router netadmin Login?
The Motorola Router has designated 192.168.0.1 as their Wifi Motorola Router Default Login IP address for accessing the netadmin panel, and they have kept the default IP in their user guides and on the Motorola Router.
What is the Default Username for Motorola Router netadmin Login?
The default netadmin username may be created by the netadmin, and the Motorola Router netadmin Username is ‘admin’ for logging into the Motorola Router netadmin Panel.
What is the Default Password for Motorola Router netadmin Login?
The default netadmin Password may be created by netadmin, and the Motorola Router netadmin password is ‘motorola’ for logging into the Motorola Router netadmin Panel.
How do I change/Reset the netadmin username or password of Motorola Router device?
If the admin password is lost or forgotten, the only method to get access to the web management system is to reset the Motorola Router configuration to factory defaults. Users can press and hold the reset button for at least 20 seconds to reset the password.