Phoenix Router Admin Login Setup: Do you like to use high-speed Internet all the time? Then you might also know that high-speed Internet does not always depend on your Broadband speed connection but on the type of router you use. And considering this fact, Phoenix has emerged as a company that has routers with amazing speed performance and great effective bandwidth usage as well.
On the other hand considering the features and spec someone might think their routers are pricey but frankly after seeing their prices, these are reasonable that all homes and offices can accommodate them and that is why we are reviewing their routers today.
How to Configure Phoenix Router Setup – Phoenix Router settings guide
Seeing how quick their speed on each router is, it’s true to believe that their internal interface for further settings is that fast and amusing as well. But for starters, you might want to take a look at the steps to learn the login process initially.
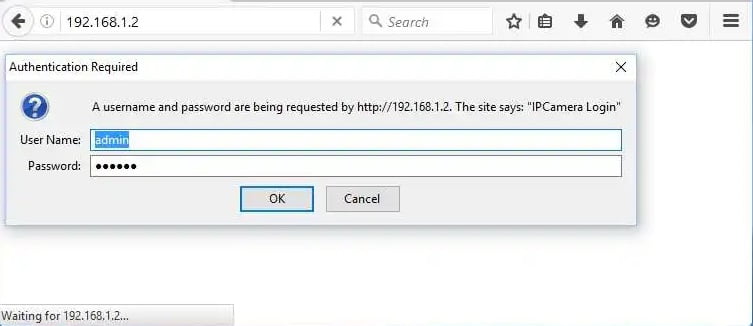
- IP Login process: So every router has their own Internal IP address and Phoenix router has 192.168.1.2.
- Open any of your browser and then click on the address bar and enter the IP address 192.168.1.2 and then click on the go option or else click on the enter button
- On the next page enter admin for the username and enter phoenix for password, then click on the login to continue loading the admin panel
Phoenix Router Admin Login Wireless Configuration – Internal Settings Process
Well wondering that the wireless configuration might be hard since this may be your first time trying to configure the router. And that is why to make this a simple process, we have listed out the steps that can help you smoothly configure the router.
Basic WiFi Setting: Click on WiFi option from the top menu section and then click on this page and make the changes as per the settings below.
- Network Mode: Select “Mixed” option
- Network Name(SSID): Enter the router network name here and this should not cross 32 characters limit and name should be alphanumeric
- SSID Broadcast: Select “Enabled” option and then click on Save Settings button

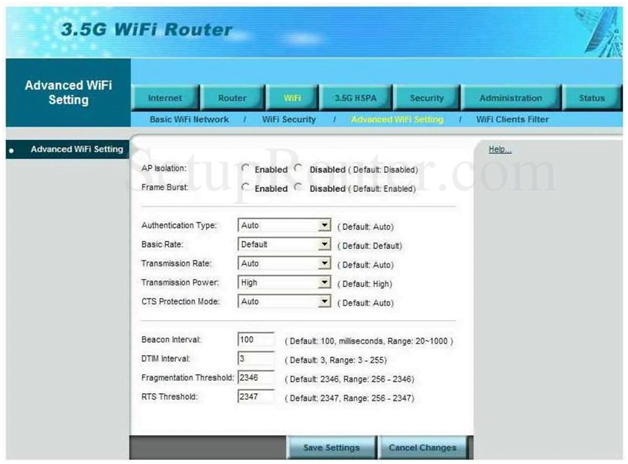
Advanced WiFi Setting: Click on WiFi and under the sub menu section click on Advanced WiFi Setting option and make the settings as per the instructions shown below.
- AP Isolation: Select “Enabled” option
- Frame Burst: Select “Enabled” option
- Authentication Type: Select “Auto”
- Basic Rate: Select ‘Default”
- Transmission Rate: Select “Auto”
- Transmission power: Select “High”
- CTS Protection Mode: Select “Auto”
- Beacon Interval: Enter “100”
- DTIM Interval: Enter “3”
- Fragmentation Threshold: Enter “2346”
- RTS Threshold: Enter “2347” and click on the Save Setting button to make changes
WiFi Security Setting: Click on the WiFI option from the top menu section and then under the sub menu section click on the WiFi Security option to make the changes as per the settings below.
- Security Mode: Select “WEP” and then click on Save settings
- This will load the password option and you have to enter a password as per your preference and then click on Save Settings button finally
Now that you have gone over the above article and made sure all the instructions are followed, then your router is properly configured now!
What is the Default IP for Phoenix Router Admin Login?
The Phoenix Router has designated 192.168.1.2 as their Wifi Phoenix Router Default Login IP address for accessing the admin panel, and they have kept the default IP in their user guides and on the Phoenix Router.
What is the Default Username for Phoenix Router Admin Login?
The default admin username may be created by the admin, and the Phoenix Router Admin Username is ‘Administrator’ for logging into the Phoenix Router Admin Panel.
What is the Default Password for Phoenix Router Admin Login?
The default admin Password may be created by admin, and the Phoenix Router Admin password is ‘admin’ for logging into the Phoenix Router Admin Panel.
How do I change/Reset the admin username or password of Phoenix Router device?
If the none password is lost or forgotten, the only method to get access to the web management system is to reset the Phoenix Router configuration to factory defaults. Users can press and hold the reset button for at least 20 seconds to reset the password.