NetGear Router Login: NetGear is one of the world’s largest and trusted Computer networking and solutions companies which has a presence of overall networking type products. Their company became popular with their range of Wireless router, the WiFi which we use in our daily life and they have released over hundreds of models that are sold all across the world. They produce all types of computer networking products and solutions which can be used from homes to offices but their set of router models are very popular and today we will discuss the configuration process.
NetGear Router Configuration Process – Step by Step Guide
NetGear is a big company and they have many routers where different IP addresses are used but they widely use only a few IP addresses and you can learn about how to access their router models from below.
- Step 1: Open your browser, head towards the address bar, and there type the IP address 192.168.0.1 and click on the go button or else you can also click on the enter button to continue
- Step 2: Now you will see the login popup will appear on the screen and here you will be asked to enter the username which is admin, and the password is password.
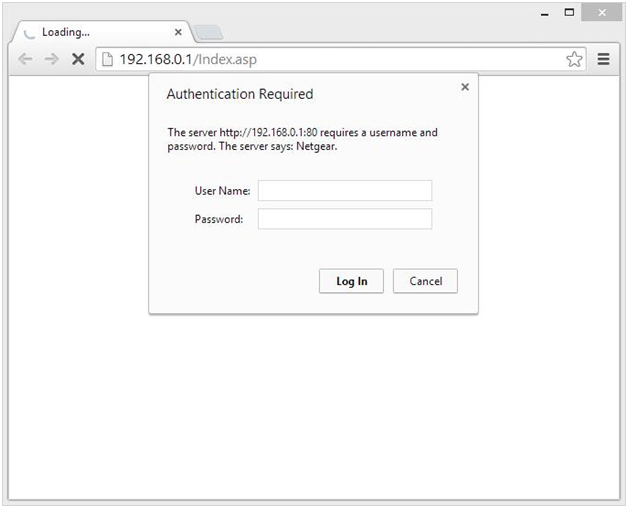
- Step 3:Type them and then click on the login button below these options and this will now give you access to the NetGear router web configuration panel.
How to enable Wireless Configuration on NetGear Router
After getting the access to the router admin panel, you have to follow the instructions below to make the settings in terms of wireless configuration.
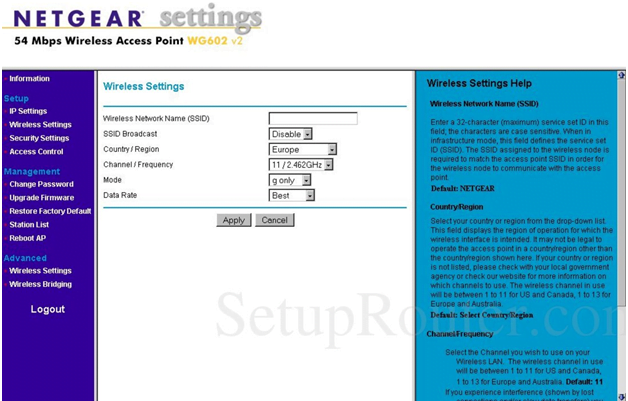
Step 4: On the homepage click on the Wireless settings option from the left sidebar and then make the changes as per the instructions below.
- Wireless Network Name (SSID): Here you will have to enter the router network name and as you already know this can be anything as per your own preference
- SSID Broadcast: Select the “Disable” option
- Country/Region: Select your country here
- Channel/ Frequency: Select “11 / 2.46GHz” option
- Mode: Select “g only” option
- Data Rate: Select the “Best” option and then click on Apply button
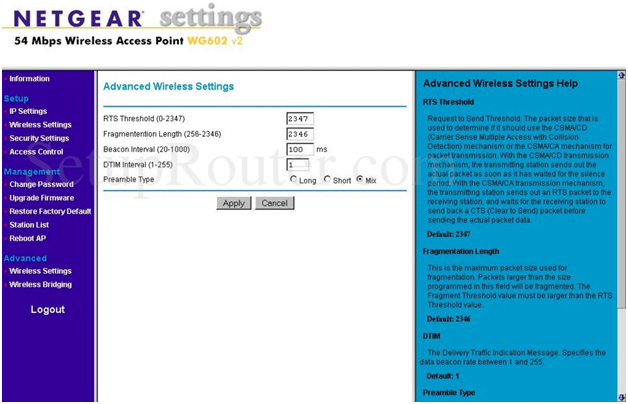
Step 5: From the left sidebar, under Advanced you have to click on Wireless Settings and then make changes as per below settings.
- RTS Threshold (0 – 2347): Enter “2347” here
- Fragmentation Length (256 – 23460): Enter “2346” here
- Beacon interval (20-1000): Enter “100” here
- DTIM Interval (1- 255): Enter “1” here
- Preamble Type: Select the “Mix” option and then click on Apply button
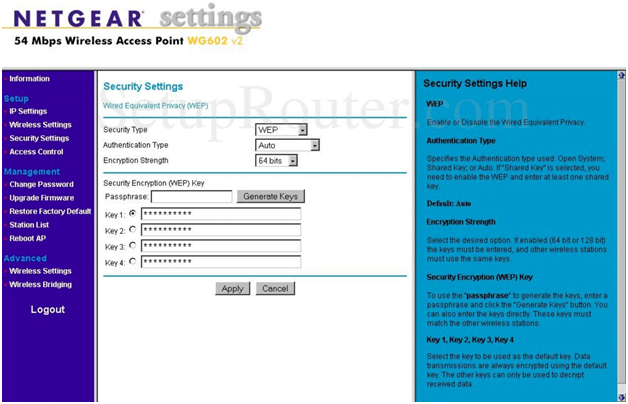
Step 6: Under Setup from the left sidebar, you have to click on Security Settings and then make the changes as per the instructions below.
- Security Type: Select the “WEP” option
- Authentication Type: Select the “Auto” option
- Encryption Strength: Select the “64 bits” option
- Passphrase: Enter your password here
- Key 1: Enter a key here and then click on the Apply button one final time for the settings to be saved
Now you have finally configured the NetGear router from the start and have made all the settings as per the instructions shown above.
What is the Default IP for NetGear Router Login?
The NetGear Router has designated 192.168.0.1 as their Wifi NetGear Router Default Login IP address for accessing the admin panel, and they have kept the default IP in their user guides and on the NetGear Router.
What is the Default Username for NetGear Router Login?
The NetGear Router Username is ‘admin’ for entering into the NetGear Router Panel, and the default admin username can be changed by the admin.
What is the Default Password for NetGear Router Login?
The NetGear Router password is ‘password’ for entering into the NetGear Router Panel, and the default admin password can be changed by the admin.
How do I change/Reset the admin username or password of NetGear Router device?
If the administrator password is lost or forgotten, the only method to get access to the web management system is to reset the NetGear Router configuration to factory defaults. Users can press and hold the reset button for at least 20 seconds to reset the password.