TP-Link Router Admin Setup: When you talk about a World-class router service, then the first name that comes to your mind is TP-Link which is a Chinese brand but they are among the top router companies in the world. This company is famous for producing wireless routers, modems, ethernet cables, and many other products for homes and businesses to make the Internet easier to use.
They have a wide range of products as they are focused on creating new products with better features every time and this is one of the reasons why this company has so many reviews and all their products are known for their speed performance moreover.
Find out how to setup & Configure TP-Link Router – Step by step process
So if you own a router from TP-Link then you need to learn how it can be configured, i.e, how someone with no experience can set up the router from scratch. All the routers from TP-Link are very easy to configure and you can follow the instructions below to learn how to configure the router directly.
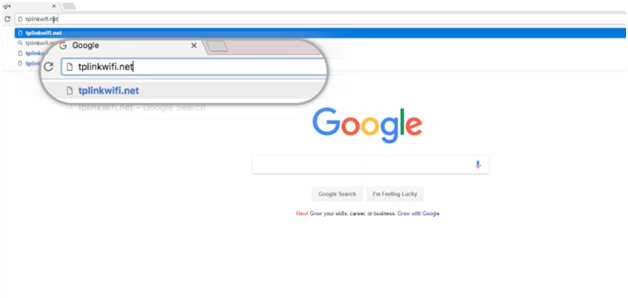
Step 1: Open your browser and then type in tplinkwifi.net (192.168.0.1 / 192.168.1.1) and then click either the enter button or press on going option to load
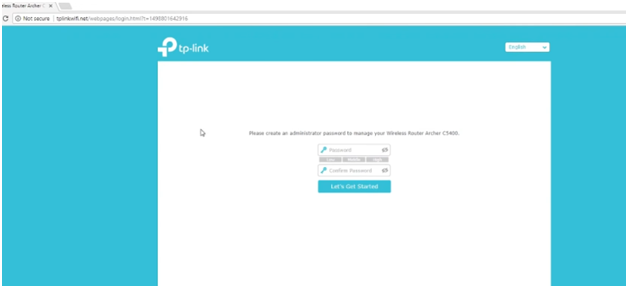
Step 2: Then you can see that the login window will appear on the screen now and here you have to enter the username and password as admin & admin respectively and then click on “Let’s Get Started” option to continue
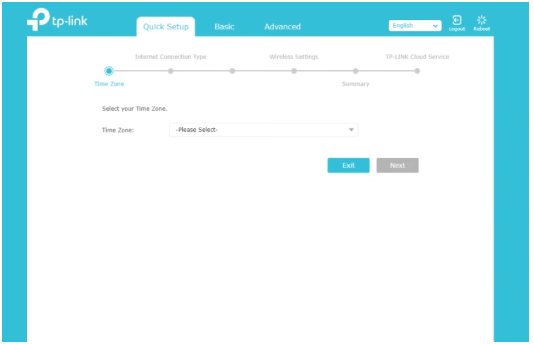
Step 3: In the next page you will be asked to select the Time Zone, select your time zone from the drop down options and then click on the next button
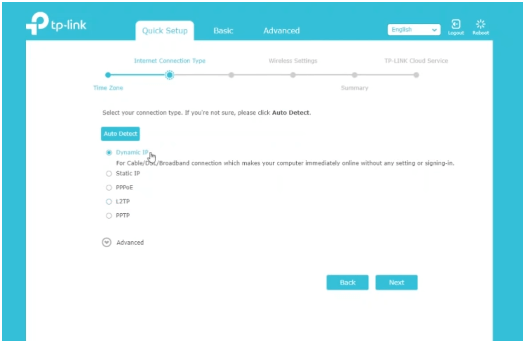
Step 4: On the next page “Internet Connection Type” you will have to click on “Dynamic IP” option and then click on the next button to continue forward in the configuration process
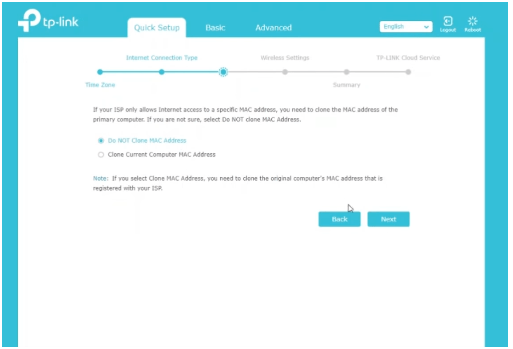
Step 5: Under Quick Step, in the next page you have to select “Do Not Clone MAC Address” option and then click on the Next button to continue
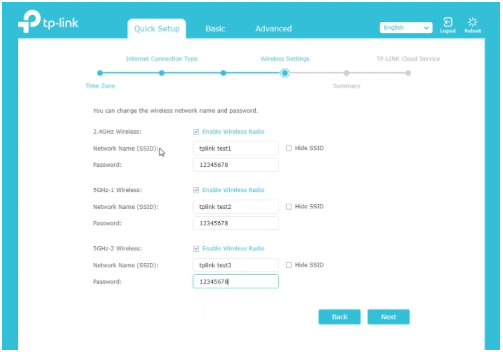
Step 6: Next Page is Wireless Settings, under this page you have to make the all the below shown settings.
- 2.4GHz Wireless: Check “Enable Wireless Radio” option
- Network Name (SSID): Enter a router network name here as per your preference
- Password: Enter a password for your router
- 5GHZ-1 Wireless: Even here you have to select the option “Enable Wireless Radio” option
- Network Name (SSID): Enter a new router network name here
- Password: Enter a new router network password here
- 5Ghz-2 Wireless: Even for this you have to check “Enable Wireless Radio” option
- Network Name (SSID): You will have to enter a separate router network name here
- Password: Enter a password for this router network here and then click on the next button
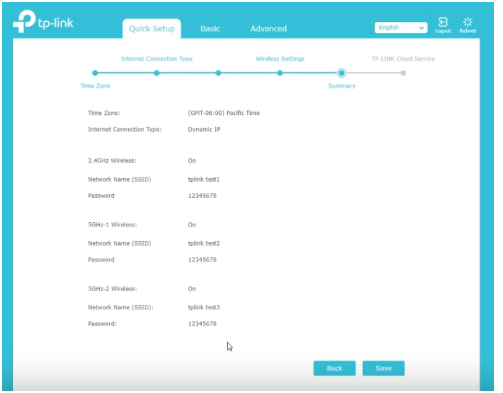
Step 7: On the next page of summary you have to review if all the details are correct and then click on the save button
Step 8: Finally you have now configured the router and then you can login or log out from your router and check that wireless setting is enabled for your router.
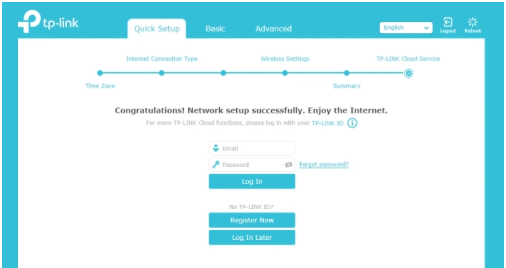
And in this way you can easily configure any TP-Link router from scratch!
What is the Default IP for TP-Link Router Admin Login?
To load, open your browser and type tplinkwifi.net (192.168.0.1 / 192.168.1.1) into the address bar, then press enter or the on going option.
What is the Default Username for TP-Link Router Admin Login?
The TP-Link Router Admin Username is ‘admin’ for logging in to the TP-Link Router Admin Panel.
What is the Default Password for TP-Link Router Admin Login?
The TP-Link Router Admin Password is ‘admin’ for logging in to the TP-Link Router Admin Panel.
How to find the hardware version on a TP-Link Router device?
Some TP-Link products may have more than one hardware version. For example, a name ending with V1, V2, etc.
How do I change the admin username or password of TP-Link Router device?
Go to Advanced > System Tools > Administration and complete the settings in the Account Management section. Enter the old username and old password. Enter the new username and enter the new password twice (both case-sensitive). Click Save. Use the new username and password