Elsa Router Admin Setup: Elsa is a familiar company when we talk about Computer solutions and has been well known for producing Networking and Computer devices for a long time now. Their advent into the router industry has been an amazing ride with the release of some of the best working modems and router which match the Industry standards all the time.
Also known for their high performing speed and bandwidth usage which made users believe in the brand and they are being used in households, offices, and industries as well.
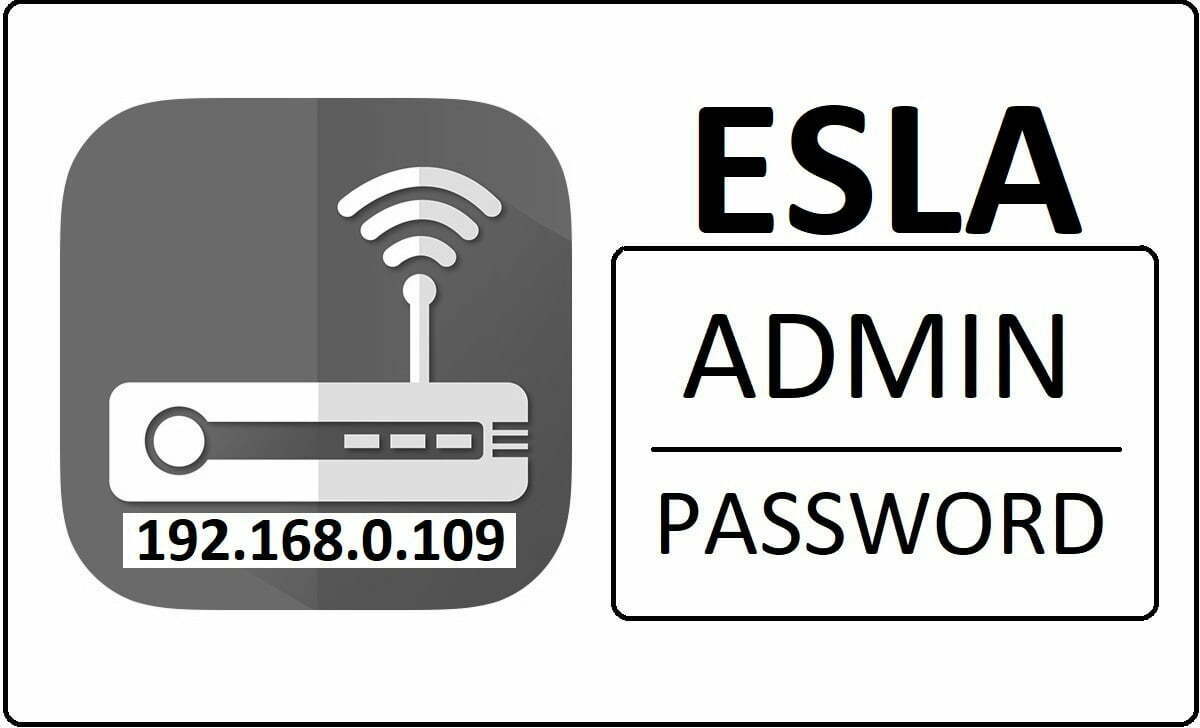
How to Setup Elsa Router Configuration – IP Address 192.168.0.109
Once the hard settings required are made correctly you can follow the below instructions which will help you to completely setup the Elsa router from the very scratch.
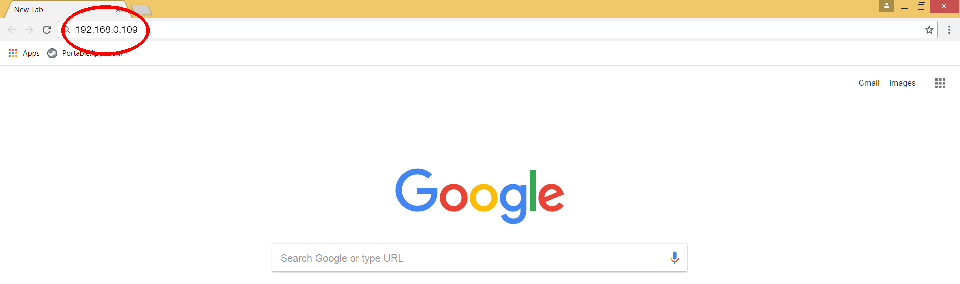
- Select any browser from your laptop or computer and then go to the Address bar, where you will have to enter the IP address for the Elsa router
- Enter IP Address 192.168.0.109 into the Address bar and then click on the continue button
- Now you will be asked to enter the login details for the Elsa router which are the default username and password.
- Enter Username as Admin and Password as none, then click on the login button which will take a minute and then redirect you to the admin panel of the router directly!
In this way, you will be able to access the Admin panel of the Elsa router and from here you need to configure the internal settings such as Wireless network and password as shown below.
Internal Configuration for Elsa Routers Online
So now you are on to the admin panel for the Elsa router and you need to follow the below settings to make the setup.
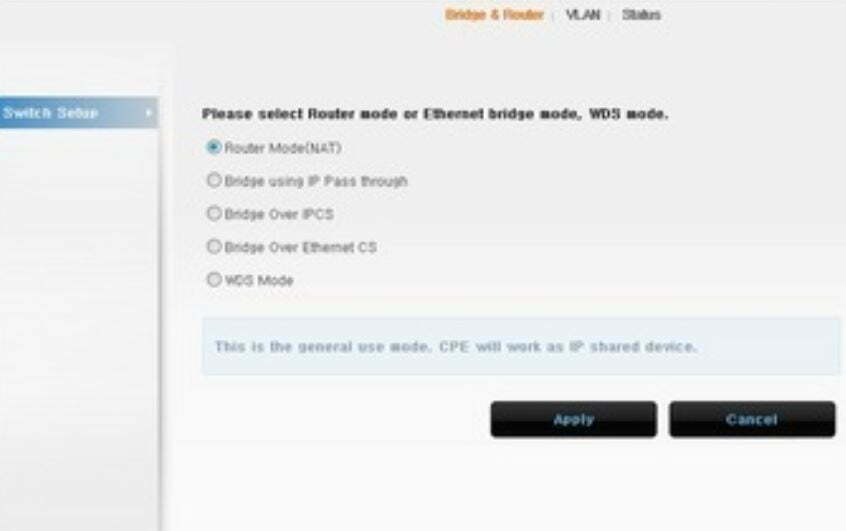
- The first page you will see now will be Switch Setup, here you have to select “Router Mode (NAT)” and then click on the Apply button. This will enable your router to work in the router mode first.
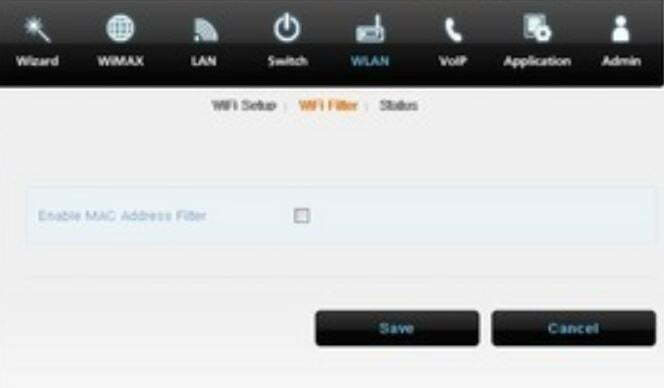
- Now click on the WLAN from the top and then select Wi-Fi filter option and under this, you have to click and check “Enable MAC Address Filter” option and click on the Save button.
- The most important part is to go to WLAN and then select Wi-Fi setup where we have to follow the mentioned settings in order to enable the Wireless connection and Wi-Fi perfectly.
- Wi-Fi Enabled/Disabled: Check Enable option here which will enable the Wi-Fi settings
- Wireless Mode: Select 911.11n/g Mixed from the drop down
- Channel: Select Auto channel from the drop-down options
- Network Name (SSID): You can enter any preferred name for your Router network, this will appear on the search when you are trying to connect to your Wi-Fi network.
- Authentication Mode: Simply select WPA-PSK from the drop-down options
- Encryption Mode: Select TCP
- Network Key: Enter a password for your Wireless network connection i.e., Wi-Fi access password.
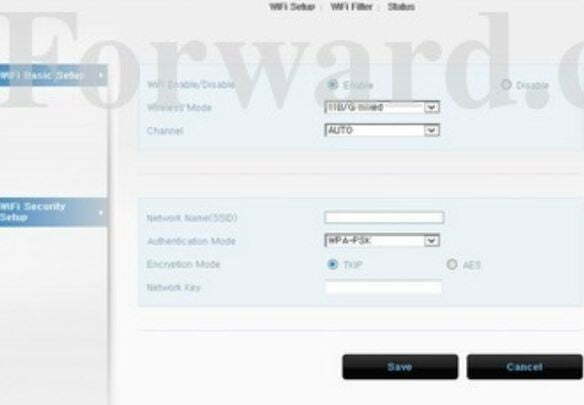
Finally, once you have made the said changes, simply click on the save button and the settings will reflect the changes in a bit.
Default Username and Password for ELSA Networks Router Admin Login Password Change
| Brand | Model | Protocol | Username | Password |
|---|---|---|---|---|
| ELSA | LANCOM OFFICE ISDN ROUTER Rev. 800/1000/1100 | TELNET | n/a | cisco |
What is the Default IP for Elsa Router Admin Login?
The Elsa Router has defined their Wifi Elsa Router Default Login IP address 192.168.0.109 to login the admin panel, and they have maintained the default IP at their user manuals along with stick a label on the Elsa Router.
What is the Default Username for Elsa Router Admin Login?
The Elsa Router Admin Username is ‘n/a’ for entering into the Elsa Router Admin Panel, and the default admin username can be changed by the admin.
What is the Default Password for Elsa Router Admin Login?
The default admin Password may be created by admin, and the Elsa Router Admin password is ‘cisco’ for logging into the Elsa Router Admin Panel.
How do I change/Reset the admin username or password of Elsa Router device?
If the administrator password is lost or forgotten, the only method to get access to the web management system is to reset the Elsa Router configuration to factory defaults. Users can press and hold the reset button for at least 20 seconds to reset the password.