Latis Network Router Setup: They are one of the largest wholesale computer networking and computer peripherals solutions companies which is well known all across the world. You might have seen a lot of different computer gadgets from them but they are also well known for creating cloud services such as hosting, security services, firewalls and more. But the main product which we are discussing today is about their router brand which has been received well by the fans and the users which is really an interesting thing. Effective router costs while providing valuable performance such as speed, bandwidth usage has been an amazing aspect to look into.
How to Configure Latis Network Router – Latis Network Router Setup Process
Hardware settings and cable management should be corrected assembled before you get into the below instructions, so that you will not face any internet connectivity problems later on. Once done, you can get right into the below guide.
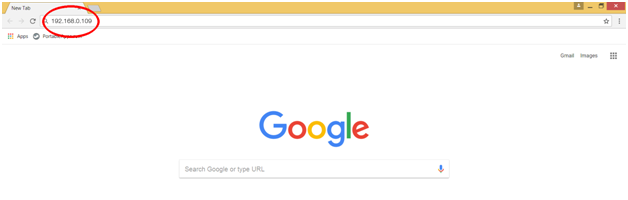
- Step 1: First the Internal IP address for the Latis Network is 192.168.0.109, open your browser and then go to the address bar. Next type or enter the IP address 192.168.0.109 into the address bar and click on the enter or the go button
- Step 2: Wait a few seconds and you will see that there is a login popup showing up which will ask you to enter your username and the password as the login information. Enter the required details, as username is admin and the password will also be admin.
- Step 3: Then click on the login button and then wait a minute which will now load the Latis Network router admin panel through which further configuration can be done.
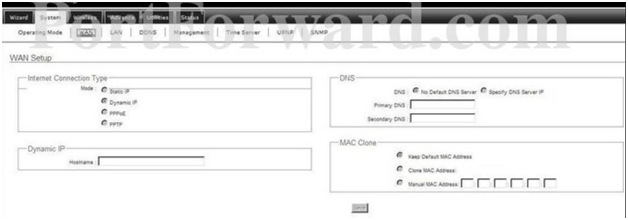
- Step 4: Now go to the System option from the top menu section and under this select the “WAN” option and you have to make the below said changes.
- Internet Connection Type: Select “Dynamic IP” option from here
- Dynamic IP, Hostname: Do not enter anything here and leave it blank
- DNS: Select “No Default DNS Server”
- MAC Clone: Select “Keep Default MAC Address” option here and finally click on the save button to make the changes.
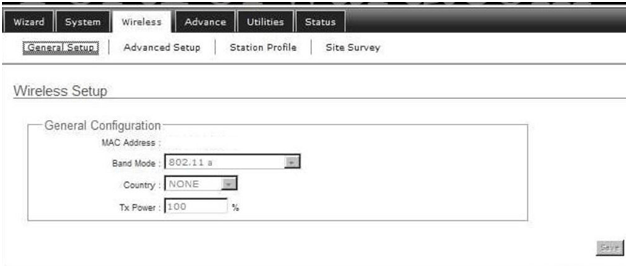
- Step 5: Now go the “Wireless” option from the top menu section and then select the “General Setup” option under this and we have to make the changes for the Wireless Setup.
- Band Mode: Select “802.11 a” option from the drop-down menu
- Country: You can select your preferred country or else keep as None as well
- Tx Power: Enter “100” here and click on save to make the changes.
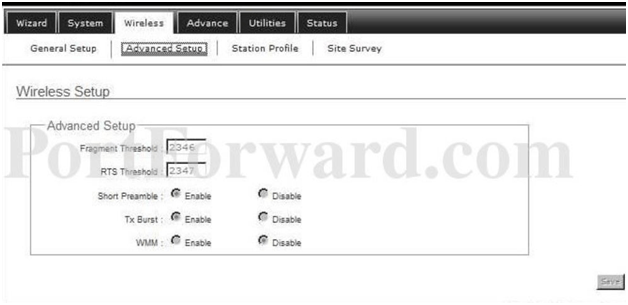
- Step 6: Now go to the “Advanced Setup” under the Wireless section and the make the changes as below instructions.
- Fragment Threshold: Enter “2346” here
- RTS Threshold: Enter “2346” here
- Short Preamble: Select “Enable” option here
- Tx Burst: Select “Enable” option here
- WMM: Select “Disable” option here and click on save button
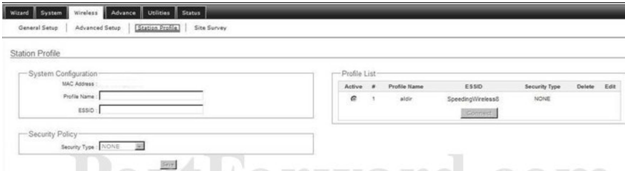
- Step 7: Now go the “Setup Profile” option under the Wireless and make the below said changes.
- Profile Name: Enter any name for the profile
- ESSID: Enter your router network name here
- Policy: Select “None” option here and finally click on the save button to make the changes.
What is the Default IP for Latis Network Router netadmin Login?
The Latis Network Router has defined their Wifi Latis Network Router Default Login IP address 192.168.0.109 to login the netadmin panel, and they have maintained the default IP at their user manuals along with stick a label on the Latis Network Router.
What is the Default Username for Latis Network Router netadmin Login?
The default netadmin username may be created by the netadmin, and the Latis Network Router netadmin Username is ‘admin’ for logging into the Latis Network Router netadmin Panel.
What is the Default Password for Latis Network Router netadmin Login?
The default netadmin Password may be created by netadmin, and the Latis Network Router netadmin password is ‘password’ for logging into the Latis Network Router netadmin Panel.
How do I change/Reset the netadmin username or password of Latis Network Router device?
The only way to admin access to the web management system if the admin password is lost or forgotten is to reset the Latis Network Router settings to factory defaults. To reset the password, the user must push and hold the reset button for at least 20 seconds.