GVC Router Network Settings Admin Setup Guide: GVC holdings have different branches in all routes of industries to expand their business and they have relatively made huge value when it comes to the online trends by releasing routers as well.
They are now well known for speaking routers that are quite durable but their outmatched performance in terms of speed and execution of configuration makes them really handy. Whereas one of the key reasons that have hit the mark for the fan base is that the prices are relatively fine as well.
This brand has a lot of different routers under their belt and we will be reviewing their top model which is GVC E800-RB1S. If you have any other router from this brand, then don’t worry because all other routers follow the same method of configuration and have the same admin panel interface which will make things easier.
How to Configure GVC Router – GVC Router Setup Guide
Let me walk you through the necessary steps to setup the router from GVC brand and we will use the router model GVC E800-RB1S.
- Firstly you have to open the browser and then in the address bar of the selected router enter IP address 192.168.1.1 and then click on the go or enter button
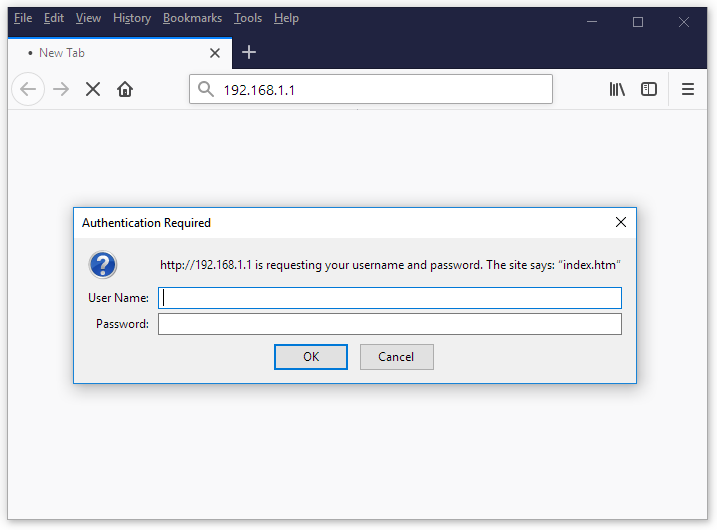
- Now we will get the login pop-up as the name suggests, it will ask for the login details on the page
- Then you have to enter the username and the password as admin and blank respectively and click on the login button
- Once you click on that page might take some time and it will start loading the admin panel access page and we can use this interface to configure the router properly.
If you are not able to connect to the given IP address then it means that the hardware connections are not made correctly and you need to check for that once.
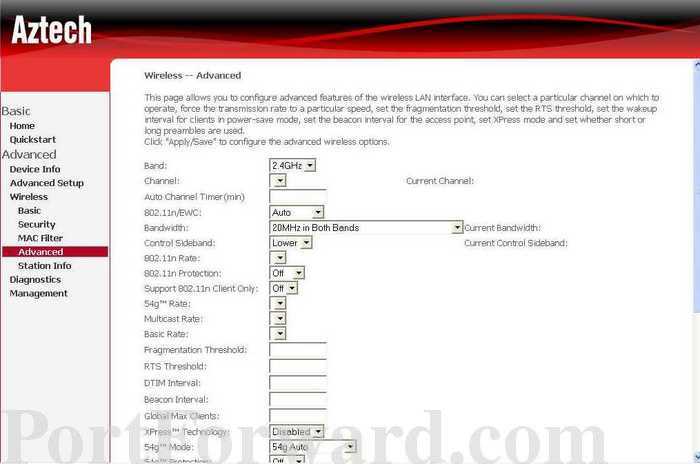
- Go to the left sidebar and from there select the “Advanced’ option under Wireless section where we will make necessary settings as shown below properly.
- Band: Select 2.4GHz from the drop-down menu
- Channel: Do not select anything here
- 802.11n/EWC: This should be selected as Auto
- Control Sideband: Select “Lower” and other setting options can be left as they are, then click on the Save button
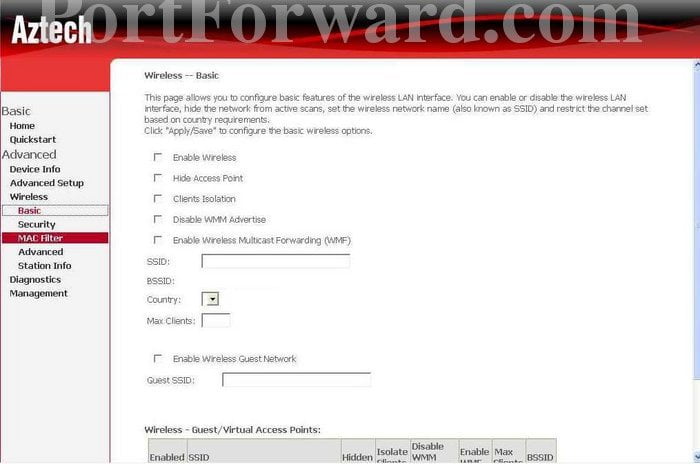
- Now we will have to select the “Basic” option from the Wireless section under the “Advanced” category and follow the below settings.
- Check the “Enable Wireless” option
- SSID: Under this box, you need to enter your router name
- Country: Make sure to select the country you are using the router from
- You can enable the guest option and once done click on the Save button for the changes to take place.
- Then go to the Access Control option and under this, you have to make the password changes which are explained below.
- Username: enter your router username here
- Old Password: Enter your old password
- New Password: Enter the new password you will be using
- Confirm Password: Enter the new password once again
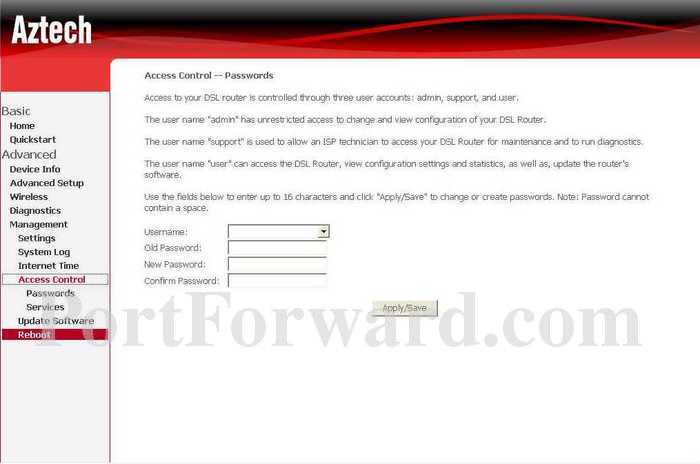
Finally, click on the Apply/Save button and this will initiate the router with wireless connection and it will be password protected also.
What is the Default IP for GVC Router Admin Login?
The GVC Router has designated 192.168.1.1 as their Wifi GVC Router Default Login IP address for accessing the admin panel, and they have kept the default IP in their user guides and on the GVC Router.
What is the Default Username for GVC Router Admin Login?
The default admin username may be created by the admin, and the GVC Router Admin Username is ‘Administrator’ for logging into the GVC Router Admin Panel.
What is the Default Password for GVC Router Admin Login?
The GVC Router Admin password is ‘password’ for entering into the GVC Router Admin Panel, and the default admin password can be changed by admin.
How do I change/Reset the admin username or password of GVC Router device?
The only way to gain access to the web management system if the administrator password is lost or forgotten is to reset the GVC Router settings to factory defaults. To reset the password, the user must push and hold the reset button for at least 20 seconds.