McAfee Router Admin Login & McAfee Router Setup: McAfeeas you all know is one of the world’s best Antivirus provider company and is among top trendsetters as well with the security industry. They have been well known for creating different gadgets and electronic devices other than the security products to capitalize on the market over time. McAfeebrand does not make routers but they have made a few with other brands in collaboration in order to make routers which are highly secured and can be used for advanced Internet browsing as well without being hacked or looking into the privacy.
So, the Router models the whole world is talking about is the one with collaboration with D-Link brand which is another huge router industry in the market. The router name is EXO and this has become an amazing product over the time due to high speed performance and the built of the product being exceptionally well made.
How to setup McAfee Router – McAfee Router Configuration Process
You might be fazed which router Internal IP address we will be using this is a product between two highly popular brands. And the IP address to be used is 192.168.1.1 and the Interface will be of the D-Link with slight changes so as to provide the users the required privacy and security features provided by McAfeein this standalone router.
- First select any browser from either your laptop or the computer and then go to the address bar, their type or enter the IP address 192.168.1.1
- Then click on the enter or the go button which will now load up the login credential page and here you will have to enter the username and the password mentioned in the router manual.
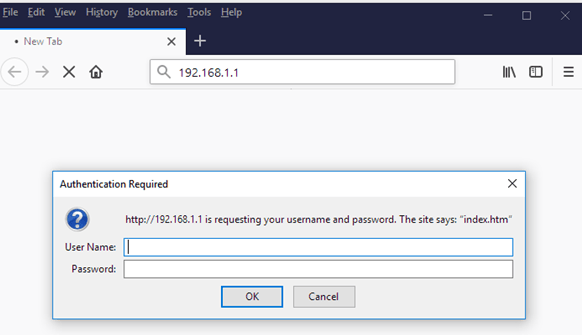
- Simply enter the username and the password as admin, then click on the login button which will now begin to load up the McAfeerouter admin panel through which you can go ahead and start the further configuration process.
McAfee Router Wireless Configuration Process – Setup Internal Settings
We now have the access to the admin panel or the web configuration panel. In next step is to enable the wireless connection which is shown in the instructions below.
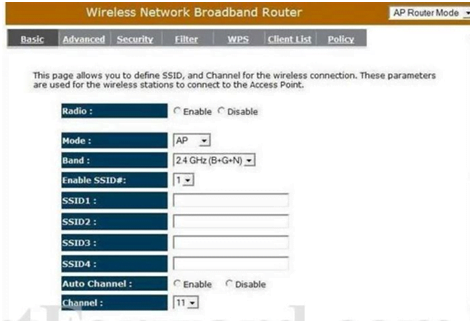
Basic Wireless Settings: Go to the Wireless option from the left sidebar and then click on the Basic option from the top, then make the changes as shown below.
- Radio: Click on the “Enable” option
- Mode: Select “AP” option
- Band: Select “2.4GHz (B+G+N)” option
- Enable SSID#: Select “1” option
- SSID1: Here enter your router network name and do not enter anything for the other SSID’s
- Auto Channel: Select “Enable” option
- Channel: Select “11” and then click on the save button
McAfee Routers Wireless Security Settings
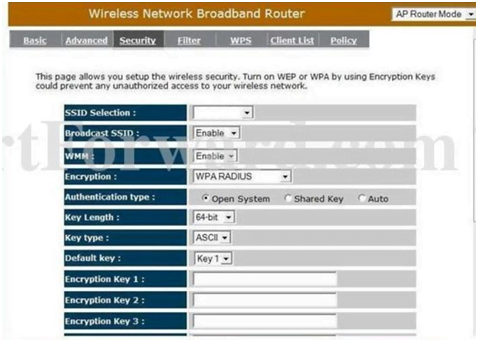
First, click on the Wireless option from the left sidebar and then select the “Security” option from the top of the menu, then make the changes as per the steps below.
- SSID Selection: Select “SSID1” which you have entered a name in the above step
- Broadcast SSID: Select the “Enable” option here
- WMM: Select the “Enable” option
- Encryption: Select “WPA RADIUS” option
- Authentication Type: Select the “Open System” option
- Key Length: Select the “64-bit” option
- Key Type: Select the “ASII” option
- Default Key: Select the “Key 1” option
- Encryption Key 1: Enter your password here and this can be a combination of numbers, alphabets and special characters as well. But make sure that the password is at least 8 characters long.
- For the rest of the Encryption Keys do not enter anything and finally click on the Save button at the bottom.
In this way you will be able to configure the router very easily and next time you can simply go over the steps above and setup the router yourself in no time.
What is the Default IP for McAfee Router Admin Login?
he McAfee Router has defined their Wifi Router Default Login IP address 192.168.1.1 to login the admin panel, and they have maintained the default IP at their user manuals along with stick a label on the router.
What is the Default Username for McAfee Router Admin Login?
The default admin username may be created by the admin, and the McAfee Router Admin Username is ‘admin’ for logging into the McAfee Router Admin Panel.
What is the Default Password for McAfee Router Admin Login?
The default admin Password may be created by admin, and the McAfee Router Admin password is ‘admin123’ for logging into the McAfee Router Admin Panel.
How do I change/Reset the admin username or password of McAfee Router device?
Double-click ePIP.exe and Select Change ePO administrator password, and then click Next. Type your SQL Server database information, and then type your new McAfee ePO administrator password and click Change Password, After the tool indicates the successful password change, click Finish.