MRO Software Router Setup: It was formerly known as PSDI but after merger, it was named as MRO Software which now has become a stable computer networking and solutions company in the United States. They are well known to produce quality wireless routers, modems, cables, ethernet ports and many more gateways that are necessary for wireless communication. Among all these the use of MRO Software routers have become a tremendous increase due to their effective usage of bandwidth and most importantly the prices of their products are really reasonable when compared to other router models in the market.
MRO Software Routers Configuration Process & setup guide
In this article we are going to learn how to set up the MRO Software router from the start and then also show you the whole configuration process.
Router Login Process: In this process we will be using the Maximo router model from this company to show you how to access the admin panel first.
- First open any browser from any laptop or any computer as per your own preference and then enter the IP address 192.168.1.1 into the address bar
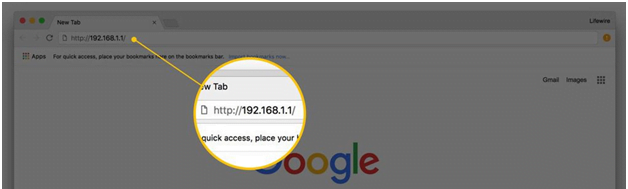
- After that you will see the login popup appear and there enter the username and password
- Username will be admin and the password will maximo, enter these details and click on login button
Once you have clicked on the login button, you will now get the access to the web configuration panel for the MRO Software router.
MROSoftware Router Wireless Configuration – Internal Settings
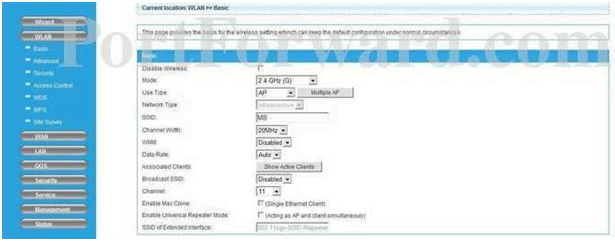
Basic Wireless Settings: Click on WLAN from the left sidebar and then under this click on Basic option present on the top and make the below said changes.
- Mode: Select “2.4 GHz (G)” option
- Use Tpe: Select “AP” option
- SSID: Enter your router network’s name here and you name this as per your own preference
- Channel Width: Select “20 MHz” option
- WMM: Select “Disabled” option
- Data Rate: Select “Auto” option
- Broadcast SSID: Select “Disabled” option here
- Channel: Select “11” option here and then click on the save button
Advanced Wireless Settings: Now click again on the WLAN settings and from the left sidebar, then click on the Advanced option under which you will have to make the changes as per the instructions below.
- Fragment Threshold: Enter “2346” number here
- RTS Threshold: Enter “2347” number here
- Beacon Interval: Enter “100” number here
- Preamble Type: Select “Long Preamble” option here
- IAPP: Select “Enabled” option here
- Protection: Select “Disabled” option here
- Aggregation: Select “Enabled” option
- Short GI: Select “Enabled” option here
- Do not change the rest of the options and then simply click on the Save button for the settings to be saved
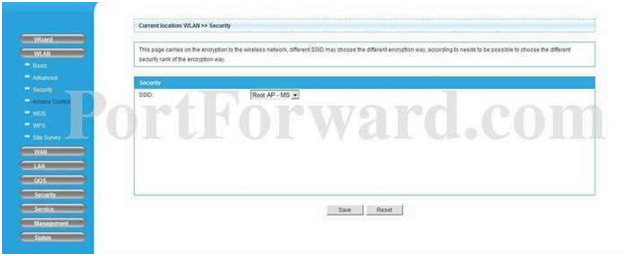
Security – Wireless Settings: Again click on the WLAN option from the left sidebar and this time click on Security option and under this you have to make changes as per the settings below.
- SSID: Select the SSID which you have set up during the Basic Wireless settings option and once done, click on the Save button which will now enable security settings on the same.
- On the next page, you will be asked to enter a password of your preference and then finally click on the Save button
In this way, you will be able to completely set up the MRO Software router from the very start to the full wireless configuration.
What is the Default IP for MRO Software Router netadmin Login?
The MRO Software Router has designated 192.168.1.1 as their Wifi MRO Software Router Default Login IP address for accessing the netadmin panel, and they have kept the default IP in their user guides and on the MRO Software Router.
What is the Default Username for MRO Software Router netadmin Login?
The default netadmin username may be created by the netadmin, and the MRO Software Router netadmin Username is ‘SYSADM’ for logging into the MRO Software Router netadmin Panel.
What is the Default Password for MRO Software Router netadmin Login?
The default netadmin Password may be created by netadmin, and the MRO Software Router netadmin password is ‘sysadm’ for logging into the MRO Software Router netadmin Panel.
How do I change/Reset the netadmin username or password of MRO Software Router device?
If the admin password is lost or forgotten, the only method to get access to the web management system is to reset the MRO Software Router configuration to factory defaults. Users can press and hold the reset button for at least 20 seconds to reset the password.