Netport Router Setup: Netport is a classic router company that is known for delivering routing products that are exceptional in terms of speed performance and also the quality of the device. In this article, we will go over the steps which will help you explain the router configuration process. You might have an old or a new router of this company want to configure it but sometimes it is much easier to follow a guide like ours from the below steps. At the same time, you will be really happy with the router because it performs well in all aspects of performance and the price is really reasonable.
How to Configure Netport Router Step by Step setup process
Assuming that you have made the proper hardware arrangements for the router, then you can go over the instructions mentioned below which will first show you the steps to login into the admin panel.
- Step 1: First type the IP address 192.168.1.1 into the address bar of the browser (Browser can be selected from either any laptop or computer but it should be connected with the router via the ethernet cable)
- Step 2: Once you click on the go or enter button, you will find a login popup that will show on the screen, and here you have to enter the username as admin and the password as setup. Then click on the login button present at the bottom of the page and this will provide you with access to the router admin panel.
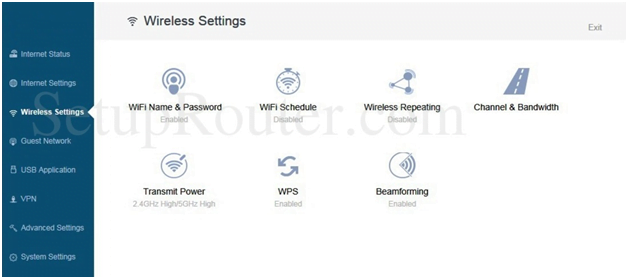
Netport Router Wireless Configuration Guide – Internal Settings
In order to make the changes for internal settings you have to click on Wireless Settings from the left sidebar and then on this page, you will find below settings that you have to configure.
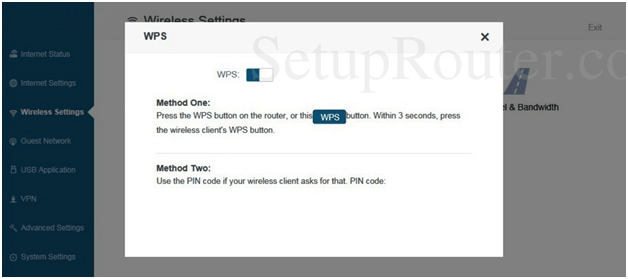
WPS: Click on the WPS and then on the screen you have to click on the button which will now enable WPS and then simply click on the X button top and the settings will be saved
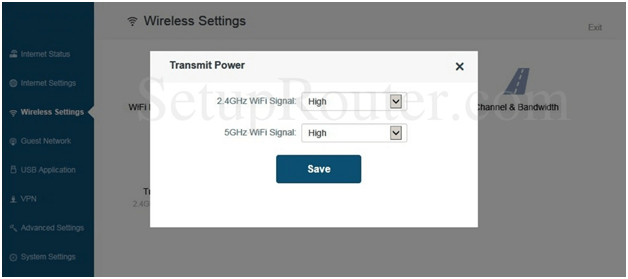
Transmit Power: On the same page click on Transmit Power and then make the changes as shown below.
- 2.4GHz WiFi Signal: Select the “High” option
- 5GHz WiFi Signal: Select the “High” option and then click on the Save button
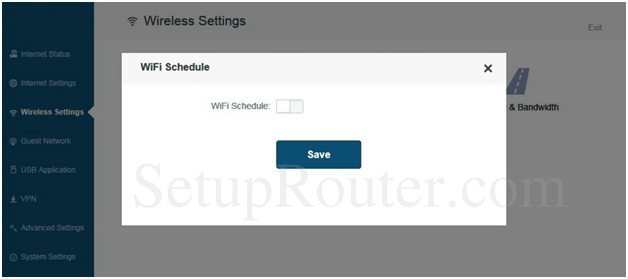
WiFi Schedule: Click on WiFi Schedule and then on the page do not enable this option and click on save button.
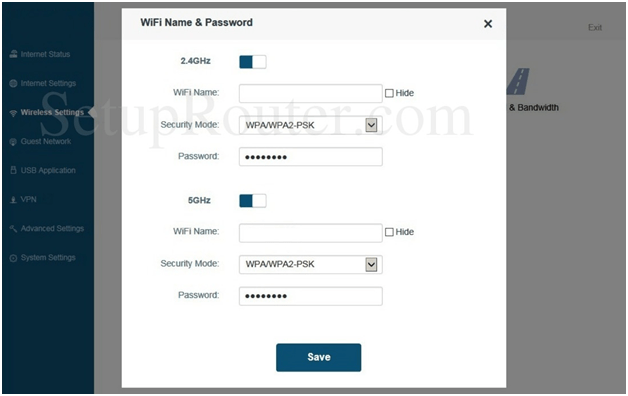
WiFi Name & Password: Click on the WiFi Name & Password and then make the changes as per below instructions.
- 2.4GHz: Enable this option
- WiFi Name: Enter your router network name here and this can be at least 8 characters long and a maximum of 64 characters.
- Security Mode: Select “WPA/WPA2-PSK” option
- Password: Enter your password here
- 5GHz: Enable this option
- WiFi Name: This should be a different router name
- Security Mode: Select “WPA/WPA2-PSK” option
- Password: Enter your password here and then click on the Save button
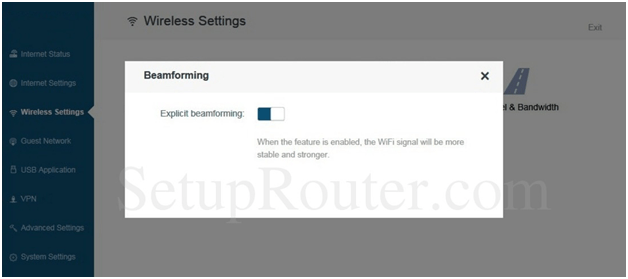
Beamforming: Click on Beamforming and then enable Explicit beamforming
Finally, click on the Save button, and in this way, you will be able to configure the Netport router in no time with all the required settings.
What is the Default IP for Netport Router Admin Login?
The Netport Router has defined their Wifi Netport Router Default Login IP address 192.168.1.1 to login the admin panel, and they have maintained the default IP at their user manuals along with stick a label on the Netport Router.
What is the Default Username for Netport Router Admin Login?
The default admin username may be created by the admin, and the Netport Router Admin Username is ‘admin’ for logging into the Netport Router Admin Panel.
What is the Default Password for Netport Router Admin Login?
The default admin Password may be created by the admin, and the Netport Router Admin password is ‘setup’ for logging into the Netport Router Admin Panel.
How do I change/Reset the admin username or password of Netport Router device?
If the administrator password is lost or forgotten, the only method to get access to the web management system is to reset the Netport Router configuration to factory defaults. Users can press and hold the reset button for at least 20 seconds to reset the password.